Whether you’re working on an eCommerce website or not, being able to navigate around your site with ease is essential, not just for crawler bots, but also for user experience. There is nothing worse than being met with a broken 404 page. and that’s why we have written a short guide below to help you understand and build redirects for WooCommerce websites.
What are Redirects?
A redirect really does exactly what it says on the tin. It redirects users on your site if the page they are searching for is no longer accessible, there could be a number of reasons that a page is no longer accessible and therefore needs a redirect implemented, such as:
- You no longer wish to have a specific page on your site however, you still want to redirect that traffic to another site which may be relevant to the content of the old page.
- The page users are trying to view is currently broken, and rather than let users or bots land on the broken page, you may want to redirect them elsewhere.
- You may have changed the domain of your website.
- After publishing a specific page or post, you may have changed the URL Slug for it and need to redirect users that are still accessing the old URL.
There are also different types of redirects, the two most commonly used redirects are 301 redirects, which are permanent redirects put in place to direct users to a relevant page and continue pulling through the link equity (link juice) that was built on the original page.
302 redirects on the other hand are temporary redirects and can be used to redirect users from pages that are broken or having maintenance done at that time.
How to Build Redirects for WooCommerce sites
Building redirects for WooCommerce sites is really quick and easy. First, you’ll want to copy and paste the URL for the page that you wish to redirect.
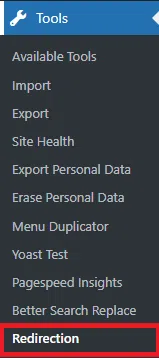
Next, go to your WordPress Dashboard and locate “tools” in the left-hand menu. From here you’ll see an option for redirection at the bottom of the “tools” menu, click and it should take you to the redirects page.
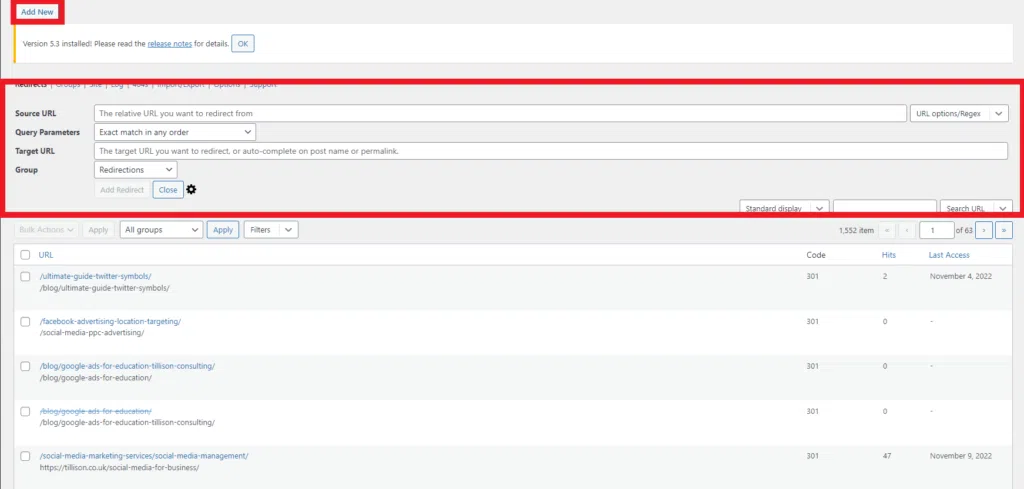
Once you have clicked on the redirects page, you’ll then want to locate the “add new” button on the top left-hand side of the page, which I have highlighted in a small red box in the image above.
This will pull down a small menu, which is also highlighted in the images above. From here you want to add the URL you copied from the page you wanted to redirect to the “Source URL” section. Then add the URL for the page that you want to direct to in the “Target URL” section.
Finally, click add a redirect, and just for safe measure check the page you are redirecting to make sure that everything has worked. If for some it hasn’t worked or an issue comes up, you just need to locate the redirect you setup in the redirection menu and just click delete.
That’s it! You have now successfully set up a redirect in WooCommerce!
If you’re worried about setting these up, or perhaps you want to avoid falling into the trap of redirect chains and loops, it’s never a bad idea to consult an expert WooCommerce SEO or eCommerce SEO Agency to help you manage these.