Many SEO techniques to improve page performance are relatively straightforward. Keep your content relevant; avoid keyword stuffing, optimize your usage of H1, H2, H3 tags, etc. Improving technical SEO can become complicated when it involves fixing the elements that are more out-of-view.
Case in point: redirect chains and loops.
These can be referred to as interconnected web issues that cause problems for search engines, negatively impact the user experience, and create issues for your page rankings. But, what exactly are they? Why do they cause problems? How do we fix them?
In this blog, we’ll be discussing all things redirect chains and loops — exploring what they are and how to fix them. This might get a little confusing, so grab a coffee now if you need it!
What is a Redirect Chain?
A redirect chain is created when a redirect is directed to a URL which is then redirected. In turn that second redirect could be redirected to a third URL, or a fourth or fifth or even more.
Think of it like redirecting your mail when you move home, but you moved three times in the space of a month. The mail sent to your first address is redirected to the second, only to find that you moved again, so the mail gets redirected a second time.
- For users, redirect chains are a poor experience because they slow down delivery of the page they wanted, or maybe even delivered a page they weren’t expecting.
- For your server, a redirect chain increases server load, making your server work harder unnecessarily.
- For SEO, redirect chains mean you’re losing the value of internal or external links – and that’s never a good idea.
What is a Redirect?
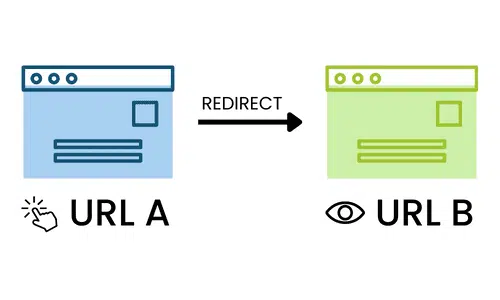
Simply put, a 301 redirect is when you forward one URL to another. If someone clicks on a link or enters an old URL into their browser, or a URL is requested by a crawler, they are instead sent to the new, desired page.
A 301 redirect might typically be used to stop a link on a page from being a 404 error or to reassign old pages (and their search engine ranking) to an alternative page. Instead of a user, or a bot, navigating to a page that doesn’t exist anymore (and thus disrupting their user journey) you can instead direct them to the alternative page with no input on their part.
For example, page A has permanently moved to page B — so you want to ensure that the old URL for page A instead directs traffic to page B.
From an SEO standpoint, this is done with the intention that the value of page A is transferred to page B. With every redirect, you’ll be hoping that page B now holds the rank page A held in the SERPs and that page B will get the ranking and the traffic that page A had.
However, this presents a problem.
Matt Cutts, a software engineer at Google, outlined that around 10% of the value of a URL is lost with each redirect. But, we want page B to have 100% of the value, not 90%.
So, how do we fix this?
To ensure that users aren’t met with a 404 error, it is of course fundamental that a 301 redirect is set up for the broken link. Next, you should go back and update your original broken link whatever blog, page, or the content it is, to instead contain a direct link to page B. This covers all bases. As such:
- Any requests for page A are redirected. Any external links will have 90% of their value passed to page B (better than a 404 page, though)
- The revised link passes 100% of the value to page B
- Crawl budget use is reduced as there is now just one step from the link to the page, rather than link > redirect to page B
How to Fix Redirect Chains
A redirect chain will occur when there is more than one redirect between the initial link a user might click on and their eventual destination page. An example of this could be:
Page A is redirected to page B
Page B is redirected to page C
Page C is redirected to page D
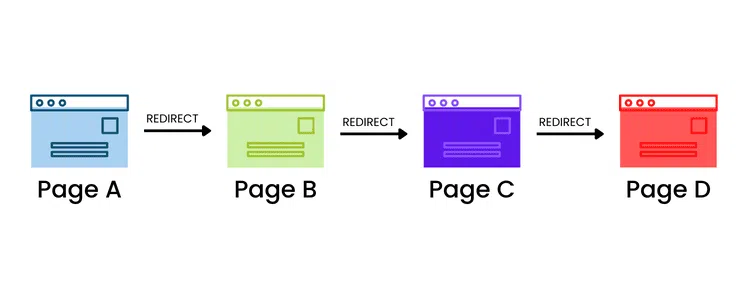
The issue is that with each redirect, the page will lose an estimated 10% of its value. In this instance, the original link to Page A only passes around 73% of the link value to Page D which is less than ideal. We also unnecessarily waste crawl budget too.
To fix redirect chains, consider the following process:
- Change any links pointing to Page A to point to Page D
- Update the Redirect for Page A > Page B to instead Redirect from Page A > Page D (90% value passed, rather than 73%)
- Change any links pointing to Page B to point to Page D
- Update the Redirect for Page B > Page C to instead Redirect from Page B > Page D (90% value passed, rather than 81%)
- Change any links pointing to Page C to point to Page D
Why does this work?
This means that there are no internal links pointing to Page A, Page B, or Page C (as these no longer exist). Crawl budget waste is reduced, which allows Googlebot to spend time crawling other pages and content it might otherwise miss, or take longer to crawl. This also means that Page D ultimately has greater authority and value, which should therefore increase its rank.
It also means that any external links pointing to Page A, Page B or Page C have around 90% of that link value passed straight to Page D too.
Unsure of how to fix this properly? We’d recommend consulting an expert WordPress SEO agency to resolve them as smoothly as possible.
Redirect Loops
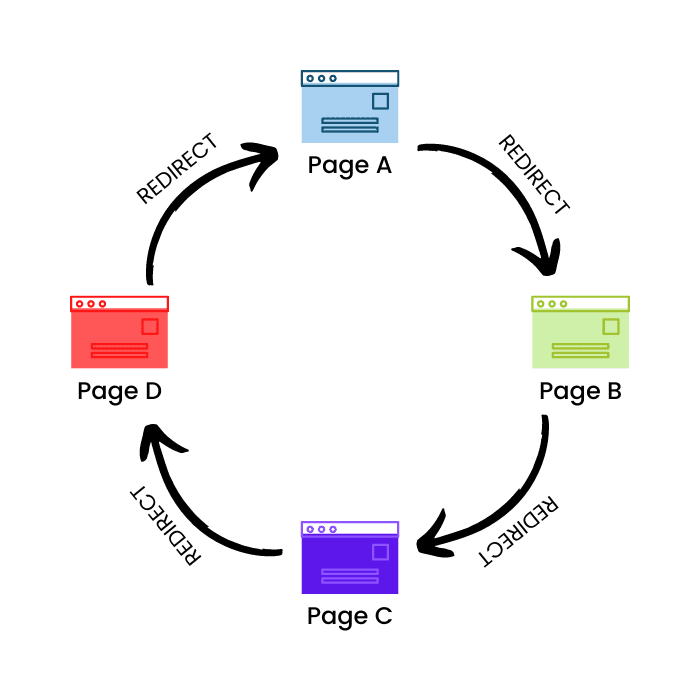
Similar to redirect chains, a redirect loop occurs when the chain ends back where it started – effectively making a never-ending loop. The redirect loop will end with the server (website) not serving at all.
Here’s an example of a redirect loop:
Page A redirects to Page B
Page B redirects to Page C
Page C redirects to Page D
Page D redirects to Page A (and so on – until Google Bot, or a user’s browser, gives up)
Needless to say, this doesn’t create a good page experience for your audience and it will inhibit Googlebot’s ability to index and rank pages. It will also waste crawl budget.
To fix redirect loops in WordPress, you must simply find the redirect which points to the beginning of the loop and correct it. Change that redirect to point to a different page which is NOT redirected. Once that is done, you’ll be left with a redirect chain, which can be fixed as described above.
In the above example, the fix is to point Page D at a page which does serve correctly – a 200 server response. Once that is corrected, you’ll be left with a redirect chain, which can be solved as described earlier in this post.
Redirect chains and loops FAQs
Got a question? We’ve got an answer
How many redirects are allowed?
It’s a good idea not to use more than 3 redirects from one page to another and so on. Google bot will not follow 301 redirects over multiple hubs.
Is a 301 redirect better than a 302 redirect?
Neither one is ‘better’ than the other, they just function differently.
A 301 redirect will indicate that a page has permanently moved to a new location. Whereas, a 302 redirect indicates that the page has moved to a new location but only temporary.
What is a 307 redirect?
A HTTP 307 temporary redirect status response code means that the requested resource has been moved temporarily to the URL given by the location headers.
What is a 308 redirect?
A HyperText Transfer Protocol (HTTP) 308 permanent redirect status response code means that the requested resource has been definitely moved to the URL given by the location headers.
What is a 200 redirect?
200 is the normal response for a given webpage. If everything is functioning as intended, this is the response.
How do I create a redirect in WordPress?
Creating a redirect will depend on the tools you integrate with WordPress or the plugins and extensions you use.
For example, if you were using the very popular WordPress plugin Redirection, the process would look like this:
1. log into your WordPress dashboard.2. Navigate to the ‘Tools’ tab on the left-hand menu.3. Select ‘Redirection’ (or other redirect plugin)4. Towards the top left of the screen, select the ‘Add New’ button.5. In the ‘Source URL’ box, enter the URL for the page you want to redirect from.6. In ‘Query Parameters’ specify your query parameters if necessary.7. In the ‘Target URL’ box, enter the URL for the page you want to redirect to.8. In the ‘Group’ box, you can specify if you want this redirect to be saved to a specific group of redirects.9. Once you’re happy with all of your settings, select ‘Add Redirect’. You should then see this redirect appear in the list below.
What is a DNS redirect?
A DNS redirect is a practice in which a user is directed to contact a different server than the one that was initially requested. As a result, the user may end up in a different domain than they originally requested.

Featured Blog
Every business, small or multi-location, needs to implement a local search engine optimisation (SEO) strategy in order to grow and increase its customer reach. In our local SEO guide, we will explain what local SEO is, why you need it, and how it can improve the visibility of your website and improve business awareness.