Google Search Console is a handy tool for webmasters wishing to improve their websites. It’s a web service from Google that allows website owners to analyze their organic traffic performance, view the search queries bringing users to their website, gain visibility on crawling errors, check the indexing status of webpages and much more.
In this blog, we’ll be taking you through the simple steps to get it set up for your Shopify website — outlining how you can get started and how you can get your website verified.
Let’s dive in!
How to set up your Property in Google Search Console
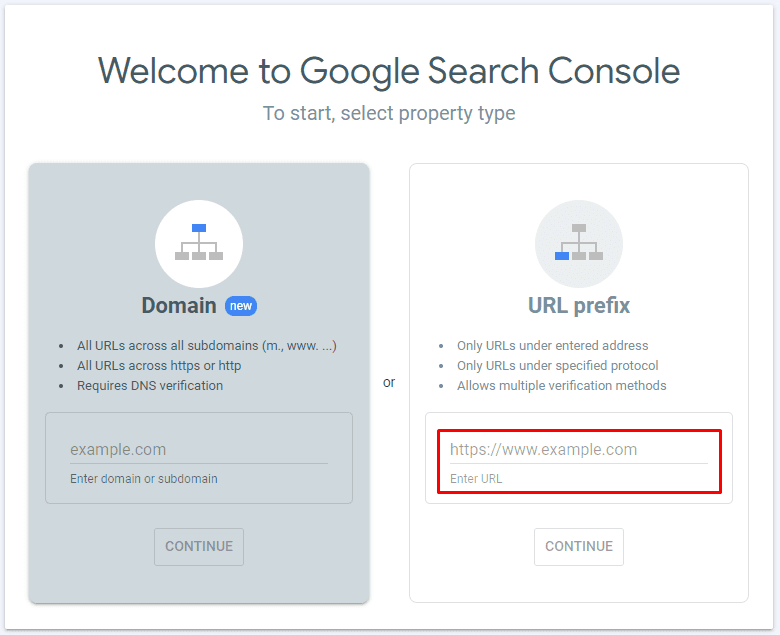
First things first, you’ll need to navigate to the Google Search Console website. Here, you’ll be presented with the option to select a property type: Domain or URL prefix. For the purposes of this guide, we’ll be using the URL prefix option as it allows multiple verification methods.
Enter your URL into the box below and select CONTINUE.
How to verify ownership in Google Search Console
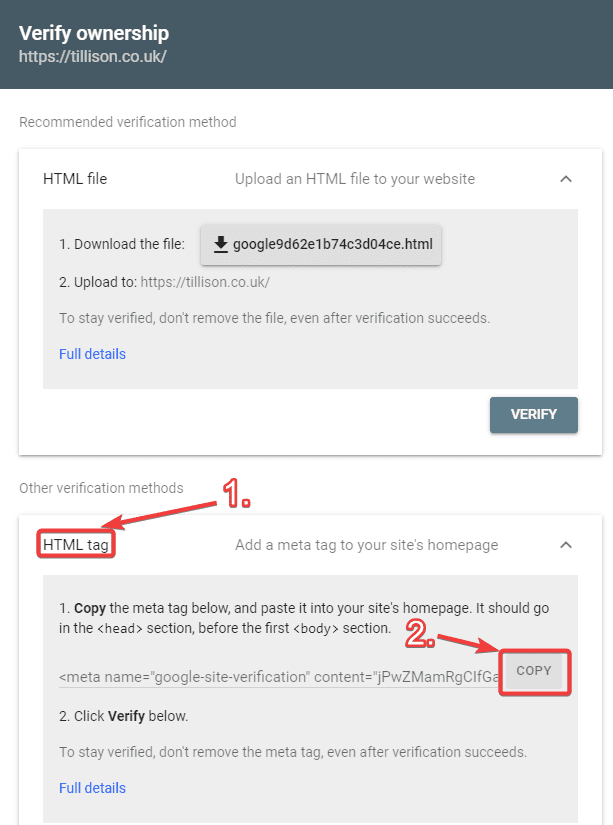
Once you have made your property, you’ll then be prompted to verify your ownership of the domain. Thankfully, Google makes this process painless by offering multiple, easy-to-follow verification methods. In this guide, we’ll be covering the HTML Tag verification method since this is the most commonly used method.
With the Verify ownership window open, follow the below steps:
- In the Other verification methods box, click on the dropdown for HTML tag and click COPY next to the provided meta tag.
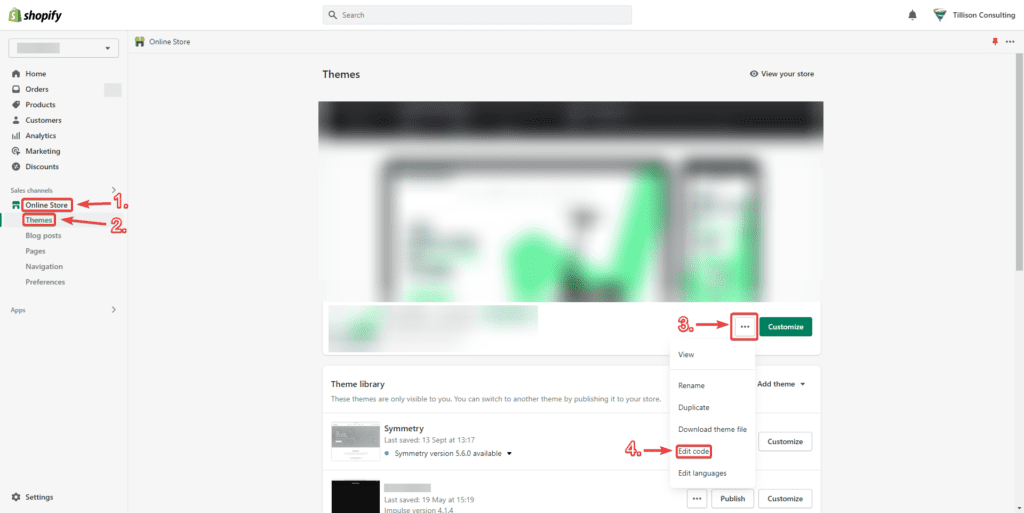
2. Navigate to your Shopify store dashboard and click Online Store > Themes
3. Select the dotted menu button next to ‘Customize’
4. Select Edit Code from the dropdown menu
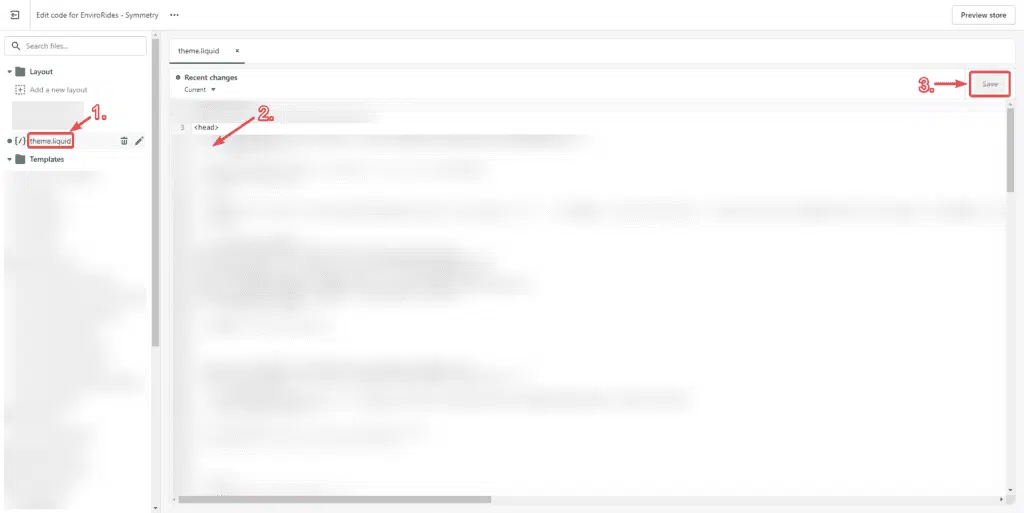
5. On the left-side navigation bar, select theme.liquid
6. Paste the previously copied meta tag in the <head> section before the first <body> section
7. Click Save
8. Navigate back to Google Search Console and click Verify
9. Provided everything has been done correctly, click Go to Property to access your new property!
And that’s it!
Now, an ocean of insights awaits. If you need assistance in managing your property or if you require technical eCommerce SEO guidance, it’s never a bad idea to consult an expert Shopify SEO agency or an eCommerce SEO Agency.